
OVERVIEW
A Trusted Device in Cisco Spaces Captive Portal is a device that administrators explicitly allow to bypass the usual captive portal authentication process. This is particularly useful for devices that do not support captive portal browsers or require seamless network access without repeated logins. The feature is managed through the Access Code Manager in the Cisco Spaces dashboard, which enables administrators to add devices by their MAC addresses and associate them with onboarding templates that define session duration, bandwidth limits, and other policies.
Usefulness and Benefits:
-
Simplifies device onboarding: Trusted devices can be onboarded directly from the dashboard without manual controller configuration or logging into multiple systems.
-
Supports non-browser devices: Devices like printers, IoT devices, or legacy hardware that cannot interact with captive portals can be securely onboarded.
-
Automates policy enforcement: Onboarding templates and authentication profiles are automatically enforced by the Cisco Spaces Radius engine, ensuring consistent policy application.
-
Real-time monitoring: Administrators can monitor device onboarding status and policy application in real time, facilitating quick troubleshooting.
-
Improves user experience: Trusted devices avoid repeated captive portal prompts, providing seamless network access.
When to Use Trusted Devices
Trusted devices are ideal in scenarios where certain devices need uninterrupted network access without user intervention. For example, in a corporate environment, a network printer or a VoIP phone that cannot authenticate via a captive portal can be added as a trusted device. This ensures these devices remain connected and functional without compromising network security.
IMPLEMENTATION
The process of adding a Trusted Device involves two main steps:
-
Creating (or using an existing) Trusted Devices Template
-
Add the trusted device
Create a Trusted Device Template
Create a trusted device template to define which devices are exempt from captive portal restrictions. This is useful for devices not supporting captive portals.
-
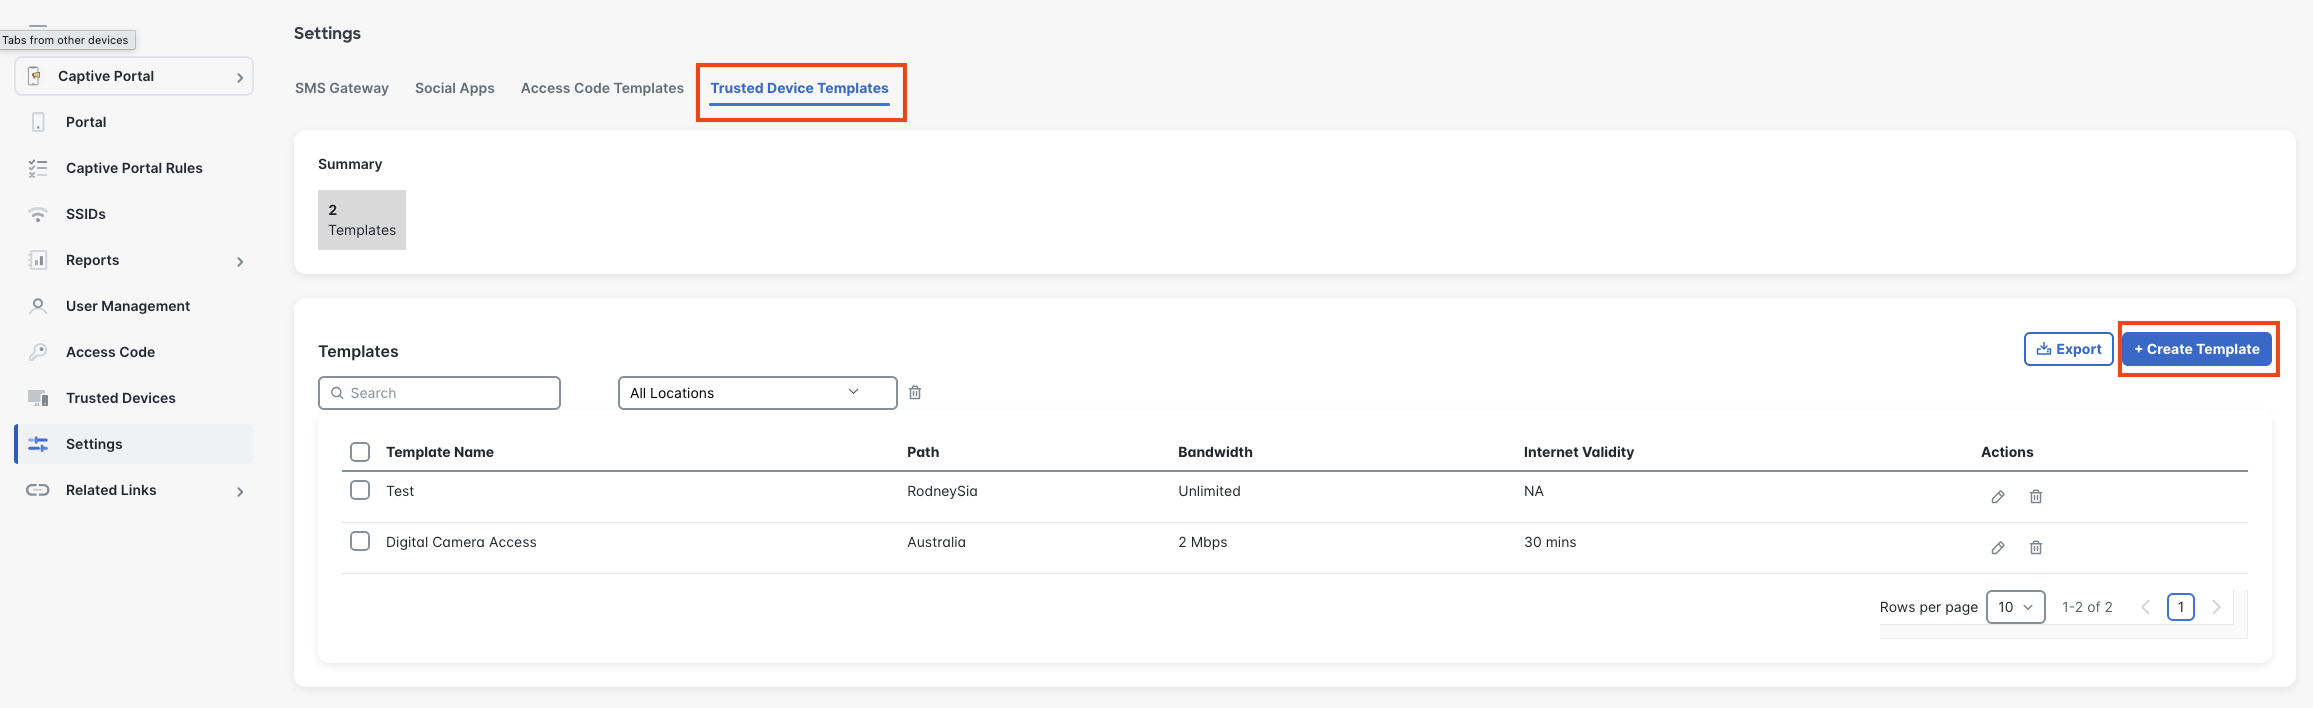
In Cisco Spaces, navigate to Dashboard > Captive Portals
-
In the left navigation pane, click Settings
-
In the Settings tab, click Trusted Device Templates
-
To create a template, click Create Template.
-
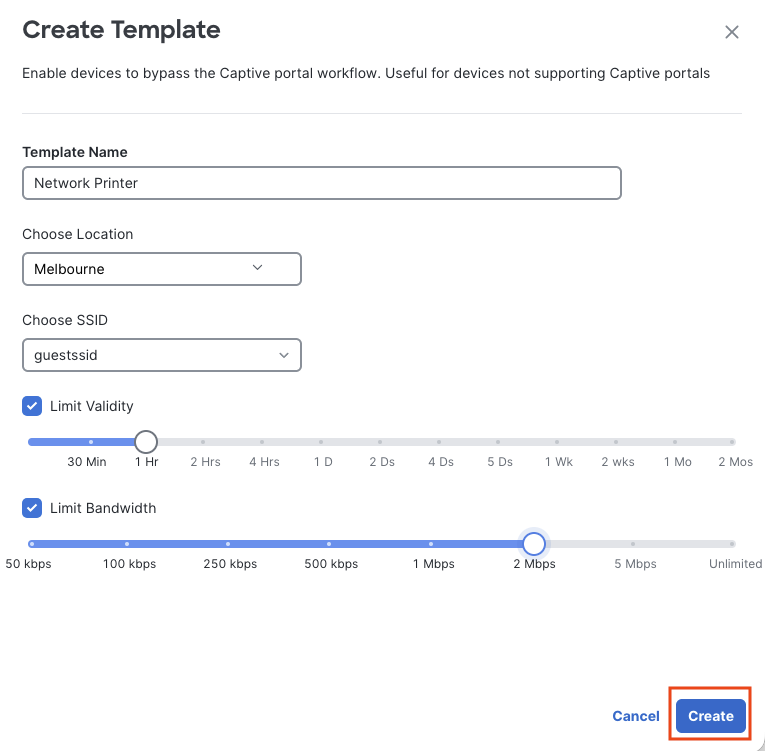
Enter the Template Name, Location, SSID, Limit Validity and Bandwidth Validity
-
Click Create
-
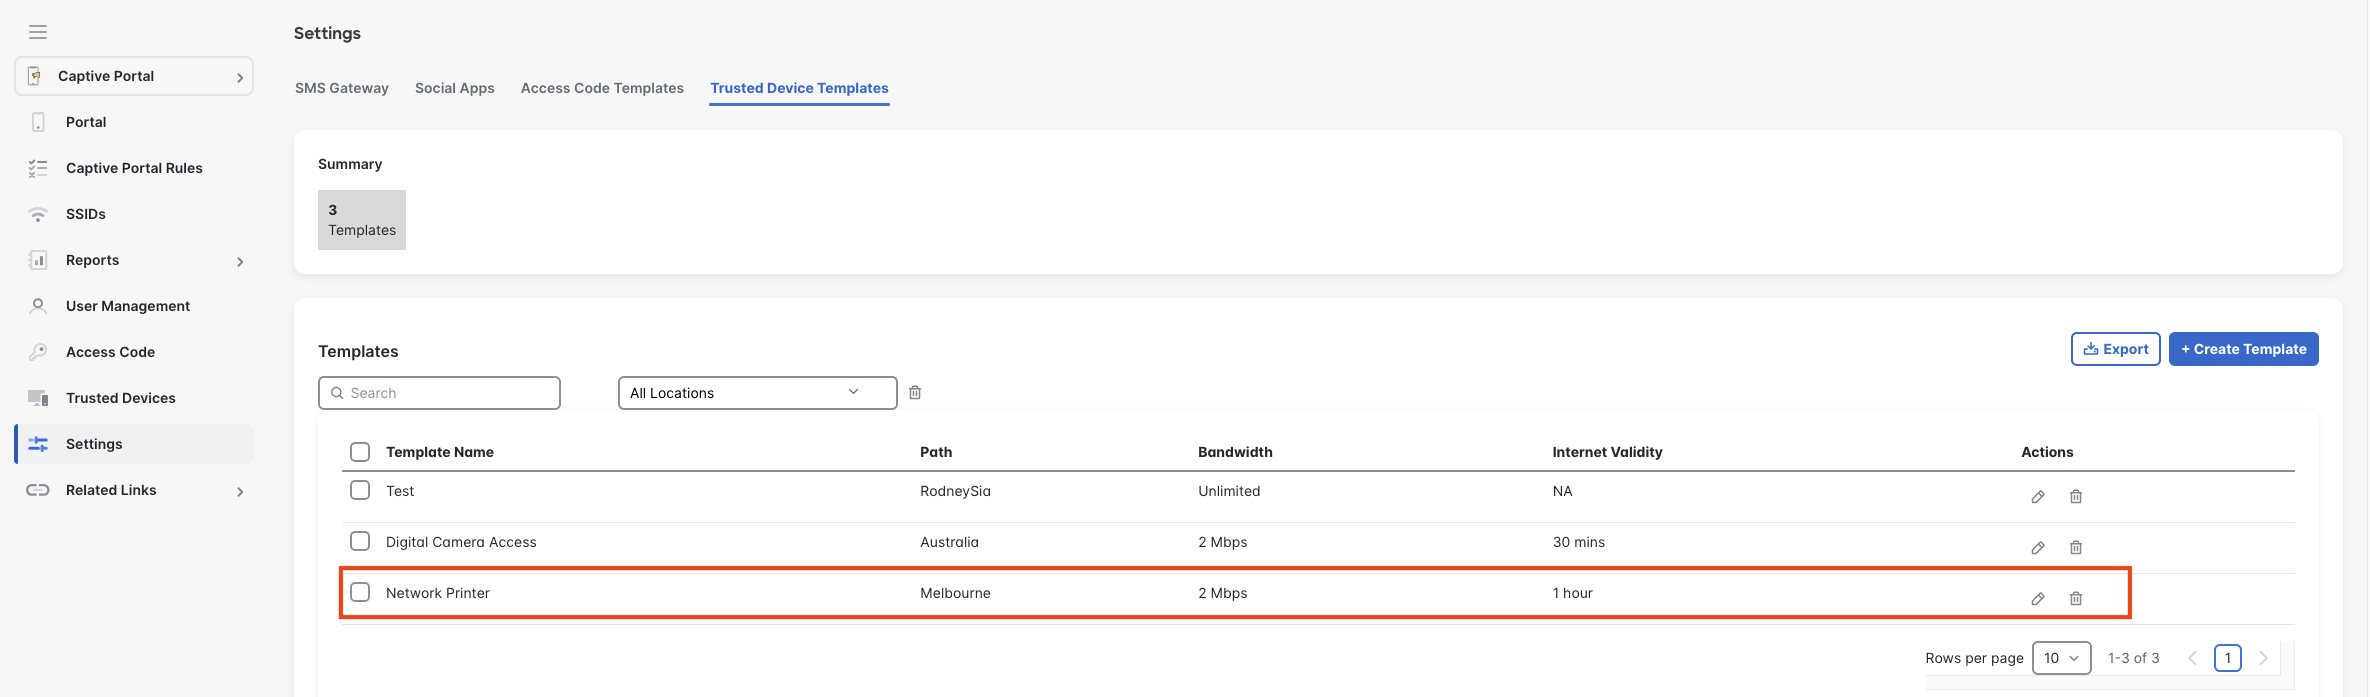
The new template is successfully created and displayed in Settings > Trusted Device Templates tab.
Add the Trusted Devices
Add trusted devices to the Captive Portal for device management by entering their MAC address.
Before you begin, ensure you have the MAC addresses for all devices to be added.
-
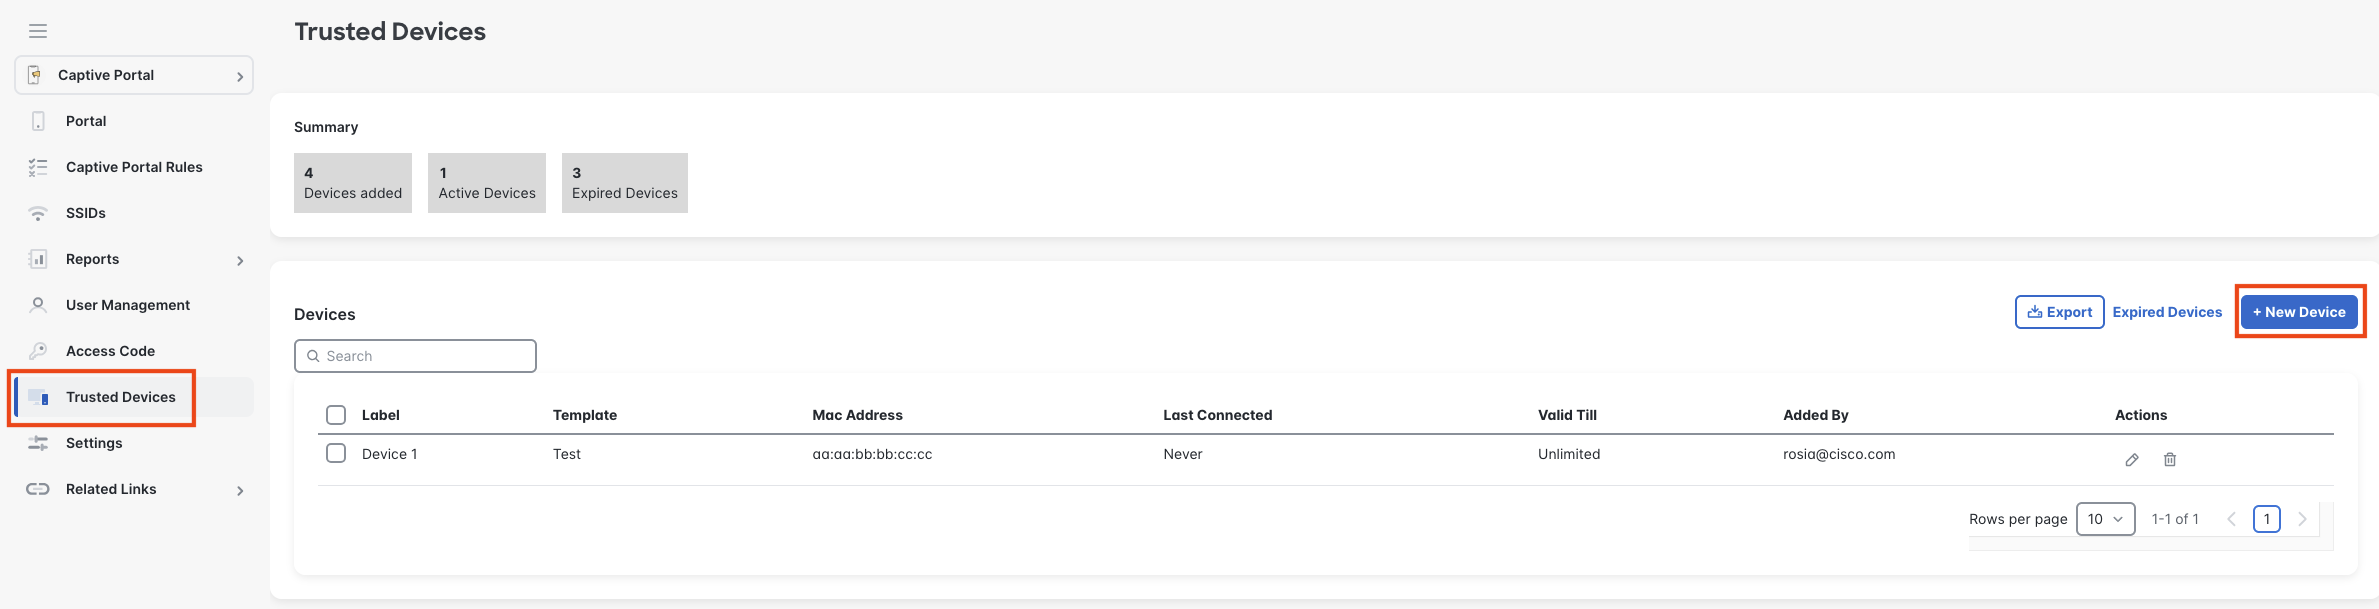
In Cisco Spaces, navigate to Dashboard > Captive Portals
-
In the left navigation pane, click Trusted Devices
-
Click New Devices
-
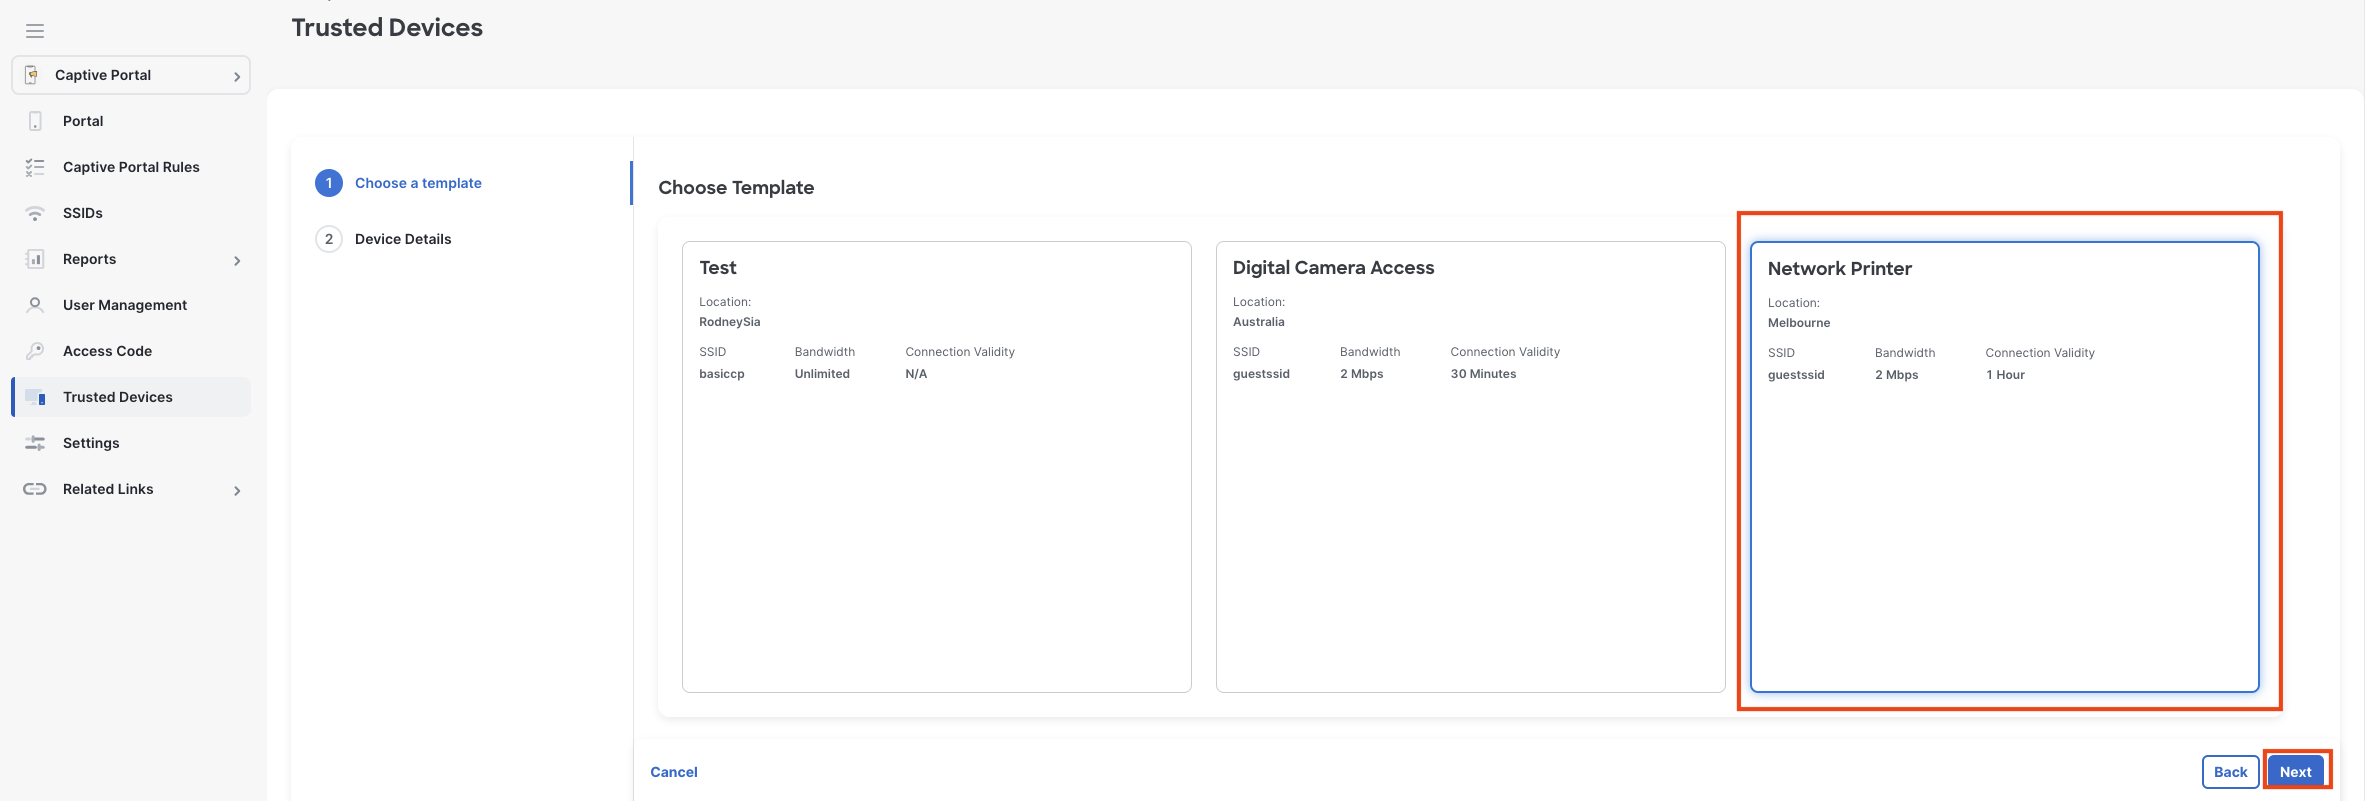
Choose a template and click Next.
-
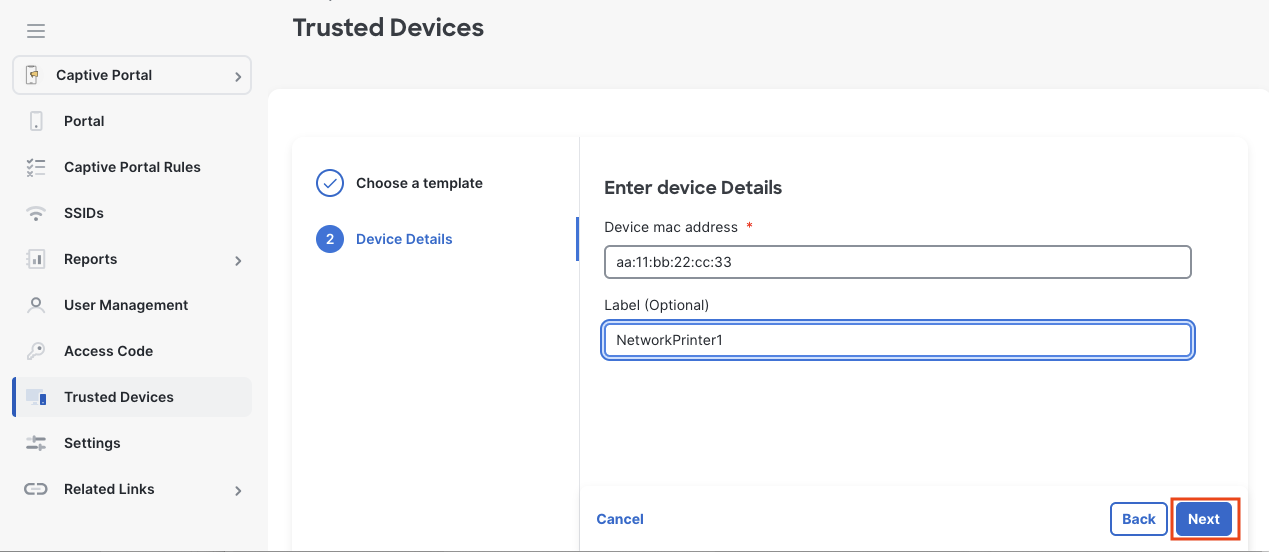
In the Device Details section, enter the MAC address of the device and provide a label description. The device MAC address is mandatory.
-
Click Next
-
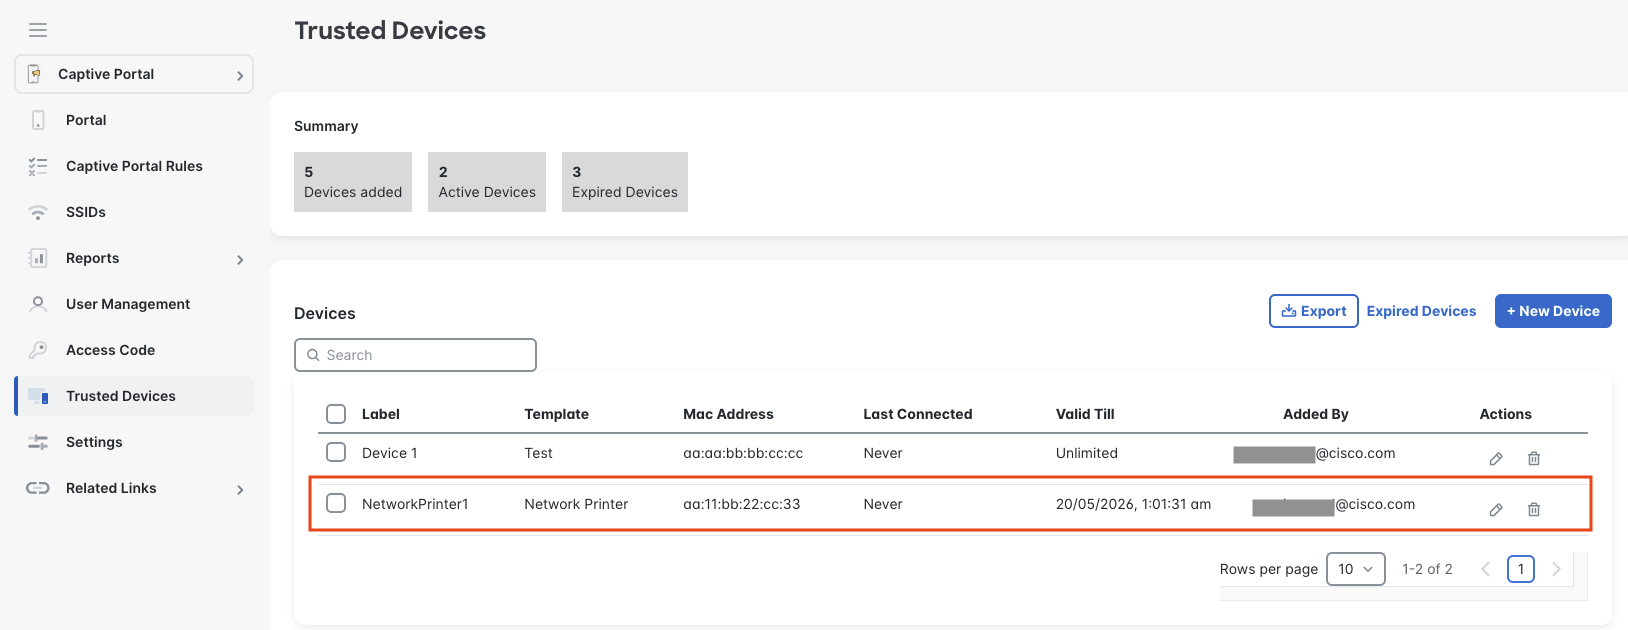
The new trusted device details are displayed in the Trusted Devices window under the Devices section.
-
You can proceed to add multiple trusted devices or edit the existing device details. Use the Edit (pencil icon) to update the device details or Delete (trash icon) to delete the device.